
Initial Email

Start Page

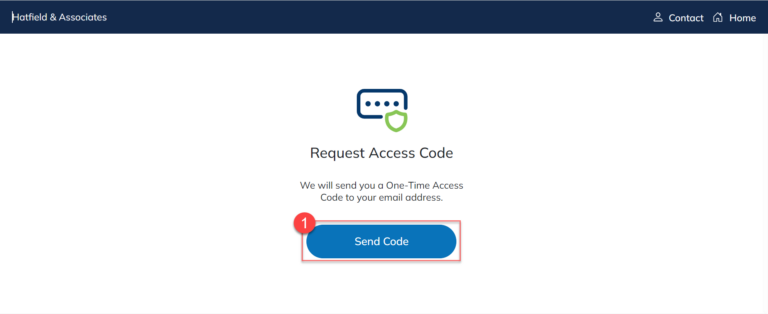
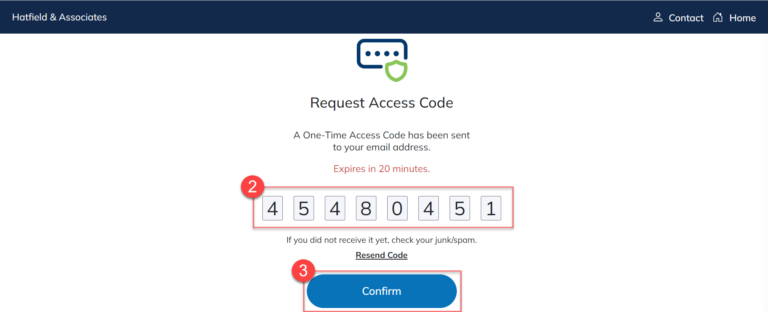
Authentication
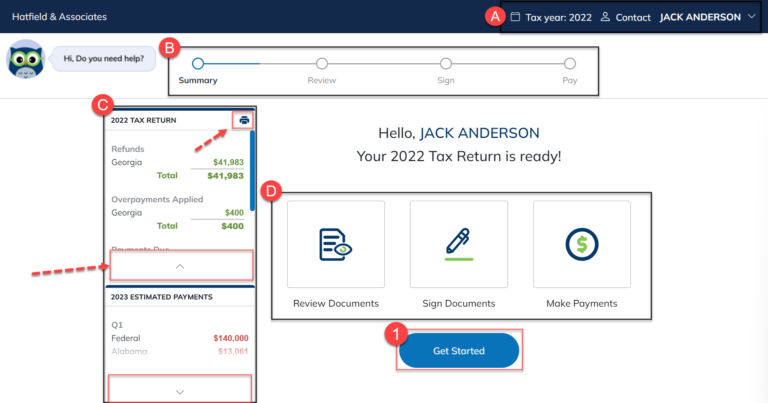
Welcome Page
Message from Preparer

Review Tax Documents

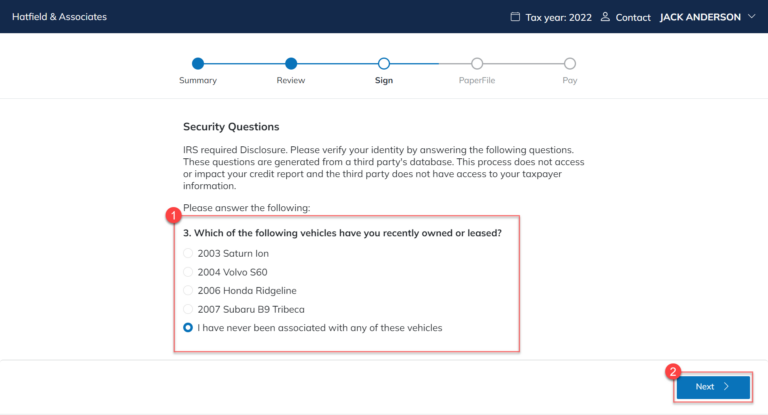
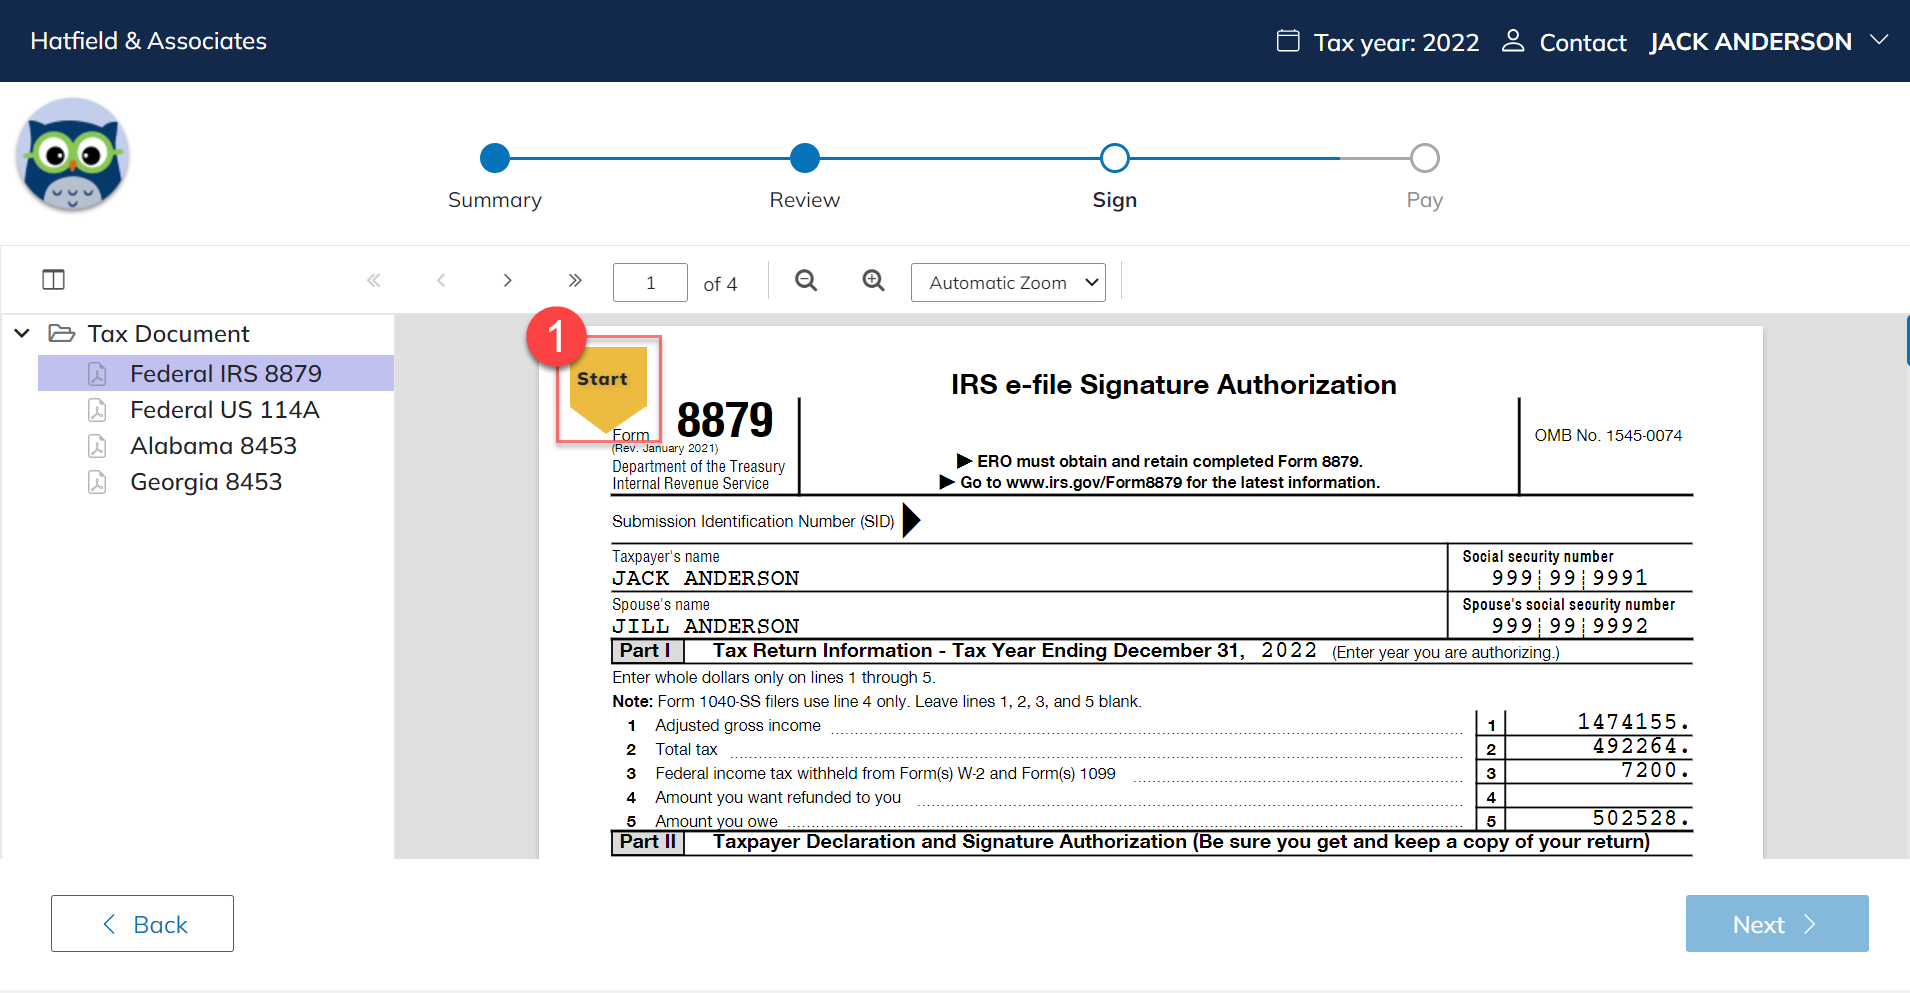
Sign Tax Documents

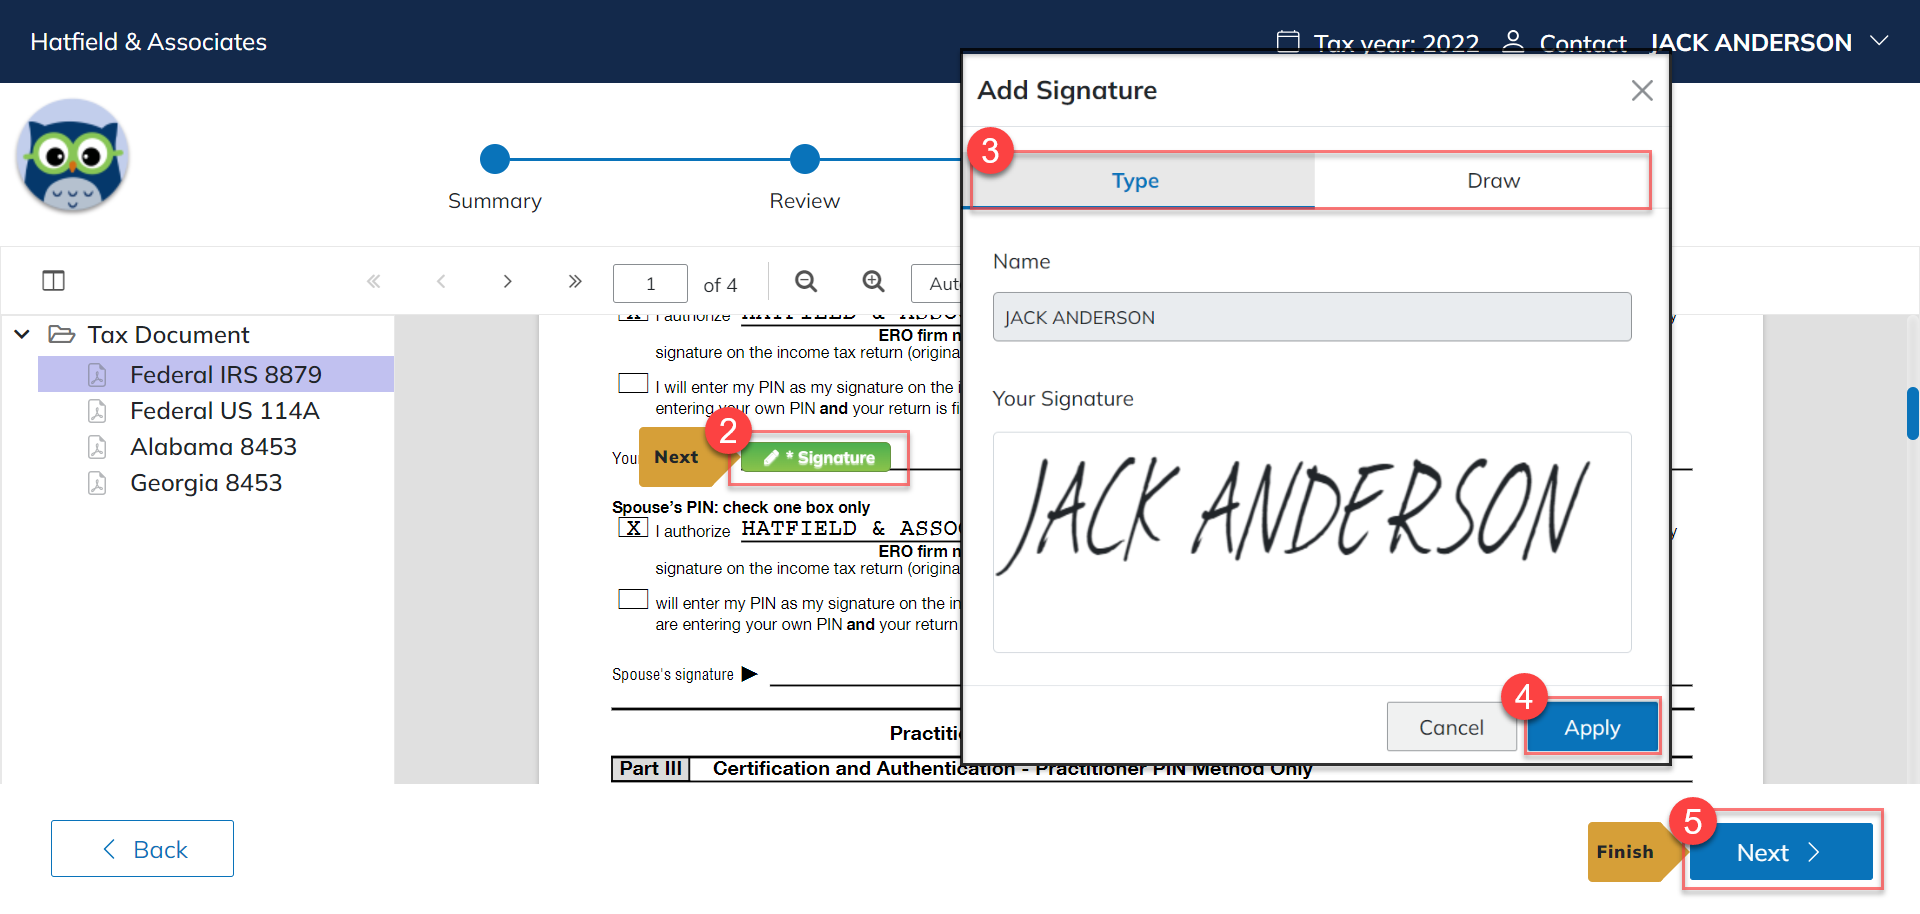
e-Sign

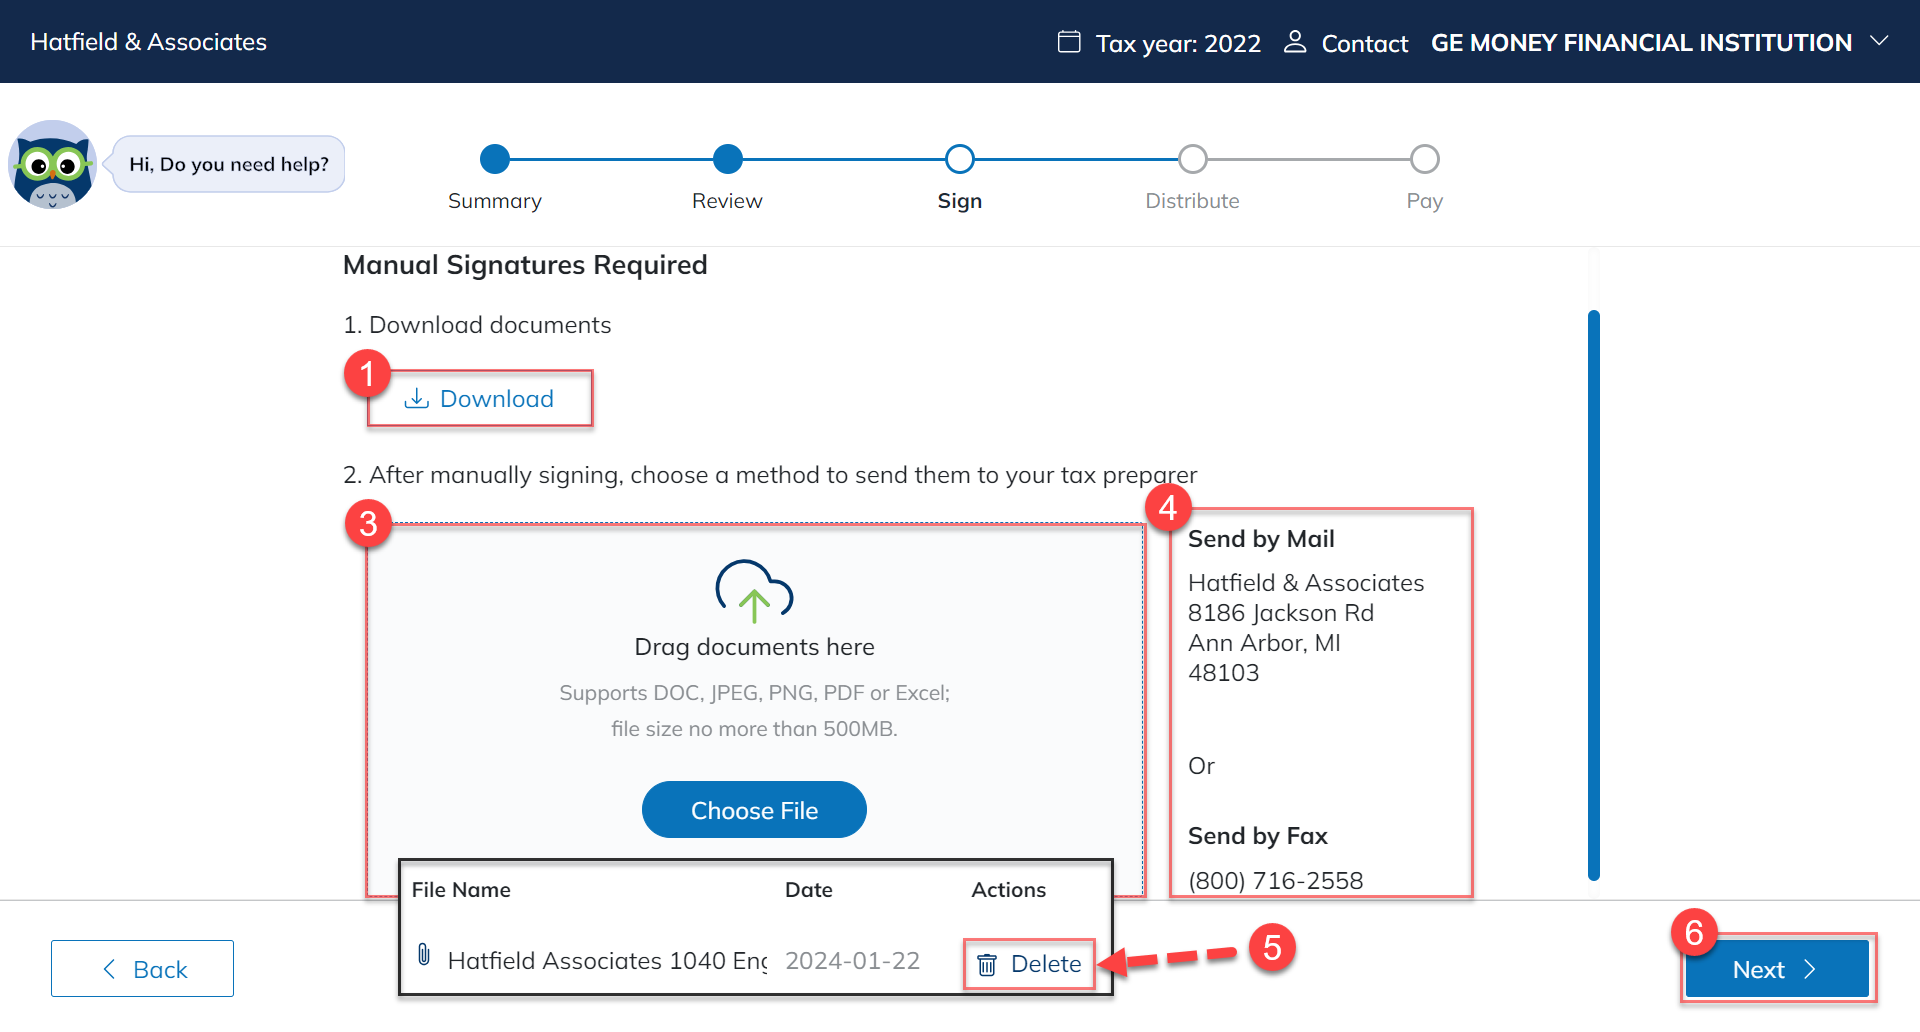
Manually Sign
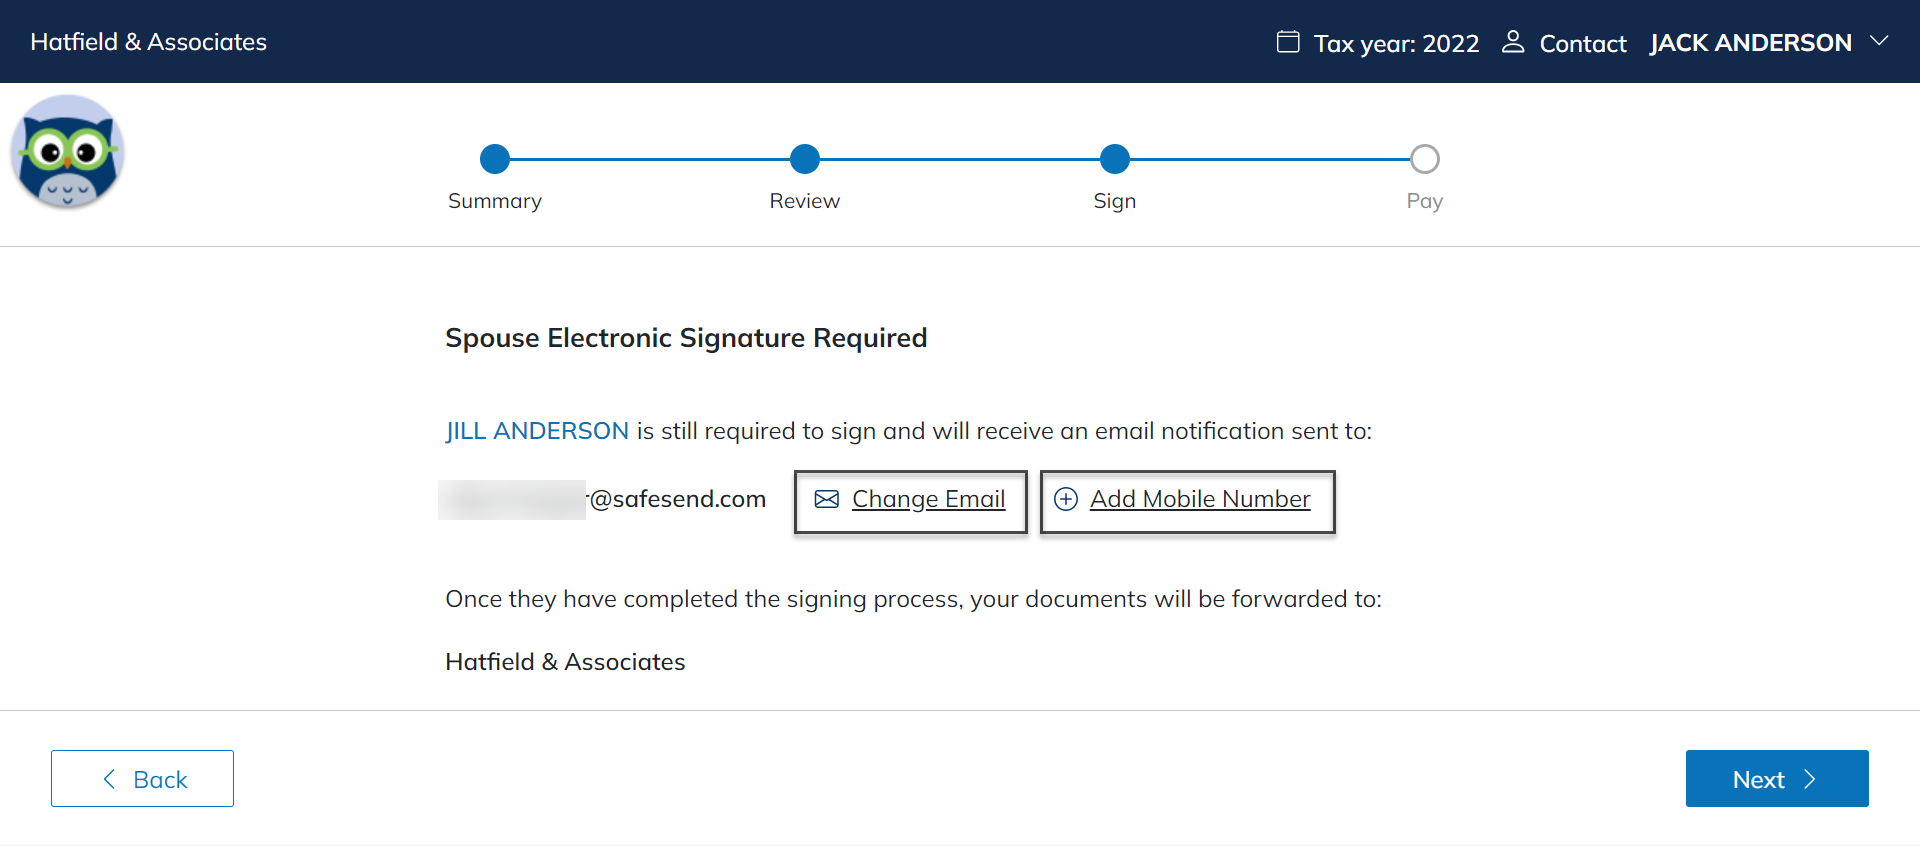
Delegate Signing


Paper File Your Returns


Tax Payments


End Page/Return Page
